Rich, flaky and filled with buttery goodness, scones are among my favorite pastries to bake. Over the years, I’ve shared a variety of sweet scone recipes with you, including my , , and, just in time for spring, .
I love a good breakfast or coffee-time scone, but lately I have had fun creating a savory scone that is perfect as a pre-dinner or brunch nibble. If the enthusiasm from my family is any indication, these Bacon, Blue Cheese and Chive Scones deliver big on that front. In fact, my 16-year-old son, Giovanni, gobbles them up at any hour — pre-dinner, post-dinner, for breakfast… you get the idea.
ADVERTISEMENT
Whenever I am making scones, I prefer to use my food processor to mix the dry ingredients together and cut in the butter. To achieve the tender flakiness of a good scone, it is important not to overwork the dough, and the food processor quickly cuts in the butter without having to handle it with my hands.
The reason this matters is that I use very, very cold butter to make all my scones. Cold butter will hold its shape during the mixing process rather than melting into the other ingredients, and it creates the necessary pockets of air that help the scone to rise as it bakes, resulting in an ultra-flaky texture. Handling the dough as little as possible helps to ensure that this result can be achieved.
Instead of mixing heavy cream as I do with my other scone recipes, I decided to use buttermilk on this occasion. I prefer the tang that it brings to the scone, as well as the extra acid that helps to produce a superior rise and texture.
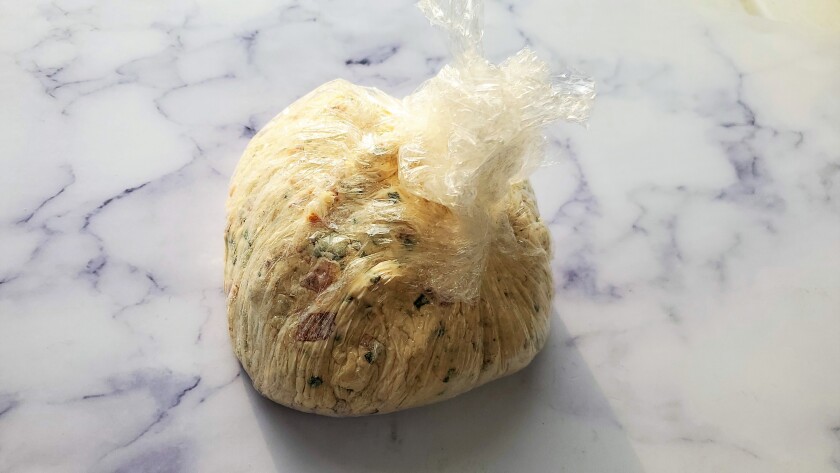
Because of the blue cheese, the dough for these scones is quite soft and moist and can be difficult to handle quickly with your hands. Once the dough has been mixed, I pour it onto a large piece of plastic wrap and use that to help me knead it into a rough ball.
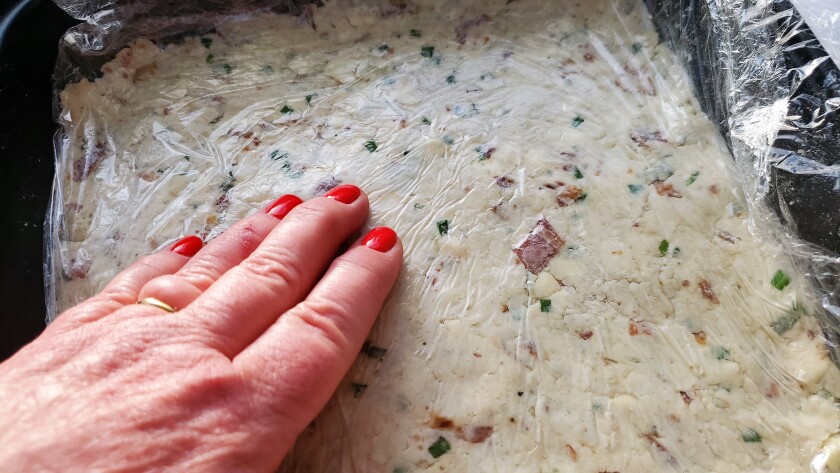
Next, I shape the dough into a square by pressing it, still in the plastic wrap, into an 8-by-8-inch square pan. You could also shape it by hand, but using the pan helps to ensure that the dough is evenly distributed so that each scone is uniform in height.
ADVERTISEMENT
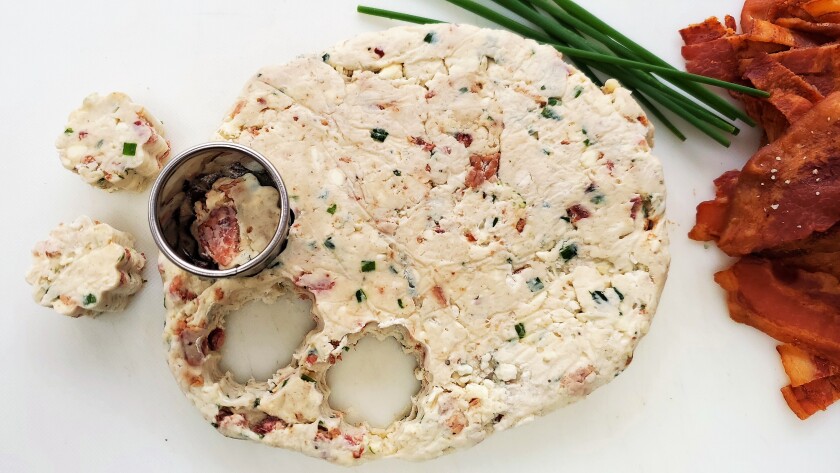
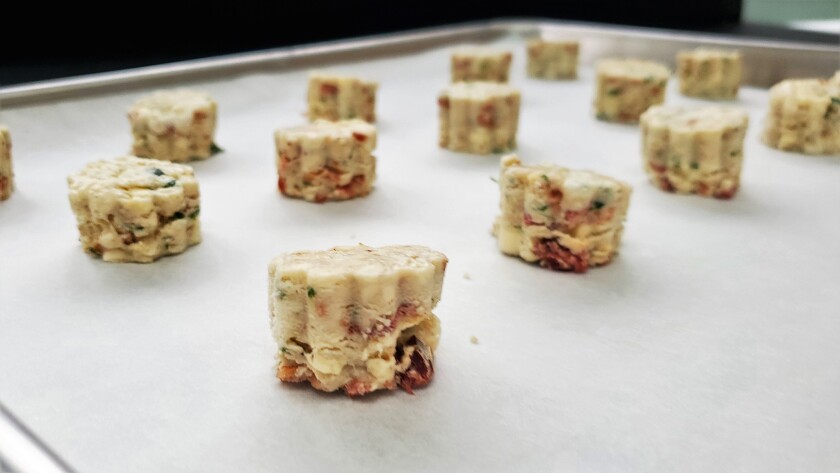
While you can make these irresistible scones in any size you desire, I prefer them in bite-sized form — around 1 inch in diameter, give or take. The smaller size ensures that there is a good share of bacon, blue cheese and chives in every bite, with just the right amount of flaky biscuit surrounding them.
I use a 1-inch scalloped biscuit cutter to shape the scones, but you could use a small ice cream scoop or just two spoons to drop them onto the baking sheet. I chill the scones in the freezer before baking so that they are as cold as possible when they go into the oven.
The scones are ready when they are golden brown, and the cheese is bubbling around them.
Full of savory flavor and deliciously addictive, these savory Bacon, Blue Cheese and Chive scones will be the hit of your table. Enjoy!
ADVERTISEMENT

Bacon, Blue Cheese & Chive Scones
PRINT: Click here for a printer-friendly version of this recipe
Makes: 3 to 3 ½ dozen baby (1-inch) scones
Ingredients:
2 cups all-purpose flour
1 tablespoon baking powder
ADVERTISEMENT
1 ½ teaspoons sugar
¼ teaspoon ground mustard
½ teaspoon kosher salt
¼ teaspoon black pepper
6 tablespoons unsalted butter, cut into ¼-inch cubes and chilled
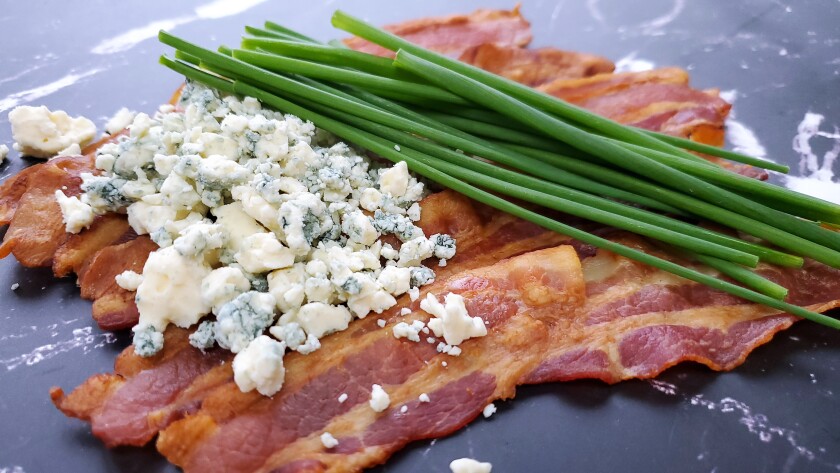
6 strips cooked bacon, chopped into small pieces
½ cup blue cheese or gorgonzola crumbles
ADVERTISEMENT
¼ cup fresh chives, finely chopped
1 cup buttermilk
For the egg wash, beat together:
1 egg
2 teaspoons milk
Directions:
Preheat oven to 425 degrees and line a baking sheet with parchment paper.
ADVERTISEMENT
Place flour, baking powder, sugar, mustard, salt and pepper in a large bowl or food processor and use a whisk to mix, or pulse 10 times.
Add butter and cut in with 2 forks or a pastry blender if making by hand, or pulse in the food processor about 12 to 15 times until the mixture resembles coarse meal.
Add chopped bacon, blue cheese and chives and pulse 3 to 4 times, just to incorporate.
If using a food processor, transfer the dough to a large bowl. Add buttermilk and gently stir into the flour-butter mixture, using a fork for best results, until a dough begins to form.
Turn dough out onto a large piece of plastic wrap. Gather corners in toward the center and twist to enclose the dough. Gently knead dough until it forms a rough ball and crumbly bits have been worked in. Dough will be quite soft, and using plastic enables you to work quickly.
Dough can be pressed into a round or square shape and cut into individual scones. If using a biscuit cutter, place the plastic-wrapped ball of dough in an 8-by-8-inch square pan and use the plastic to press it into the pan in a smooth, even layer. Cover top with plastic wrap and place pan in the freezer for 20 minutes, or until quite firm and cold.
Working quickly, dip your cutter in flour and cut out the scones, placing them 1 ½ inches apart on prepared baking sheet. Return scones to the freezer for 15 minutes.
Make an egg wash by whisking egg and milk together until frothy. Brush tops and sides of each scone and place sheet on lower center rack of the oven. Bake until tops are golden brown and firm to the touch, about 14 to 16 minutes.
Remove from oven and let cool on baking sheet for 3 minutes, then transfer to a wire rack to cool until warm to the touch. May also cool completely, store at room temperature and reheat just before serving — at 300 degrees for 5 to 8 minutes.
To store: Scones can be kept fresh for up to 2 days if stored in a metal container or covered with aluminum foil.
To freeze unbaked scones, freeze them first on a baking sheet for 1 hour, then transfer to a freezer bag or airtight container and freeze for up to 3 months. Bake without thawing (amount of time to preheat oven is just fine), adding 2 to 3 minutes to baking time if needed.
To freeze baked scones, wrap each individually in plastic, transfer to a freezer bag or airtight container and freeze for up to 6 months. Thaw at room temperature before unwrapping and, for best results, warm in a 350-degree oven for 8 to 10 minutes until warm.
Recipe Time Capsule:
This week in...
- 2020:
- 2019:
- 2018:
- 2017:
- 2016:
- 2015:
- 2014:
- 2013:
Recipes can be found with the article at InForum.com.
“Home with the Lost Italian” is a weekly column written by Sarah Nasello featuring recipes by her husband, Tony Nasello. The couple owned Sarello’s in Moorhead and lives in Fargo with their son, Giovanni. Readers can reach them at sarahnasello@gmail.com.